Tutorial: Adding Objects (Simple)
Overview
Your first level in Sonic RPG was pretty cool and all, but it probably felt a little empty. Let's talk about adding some objects to your level.
Adding a Save Point
One of the simplest objects to add to your level, but one which could be crucial to its design, is a save point.
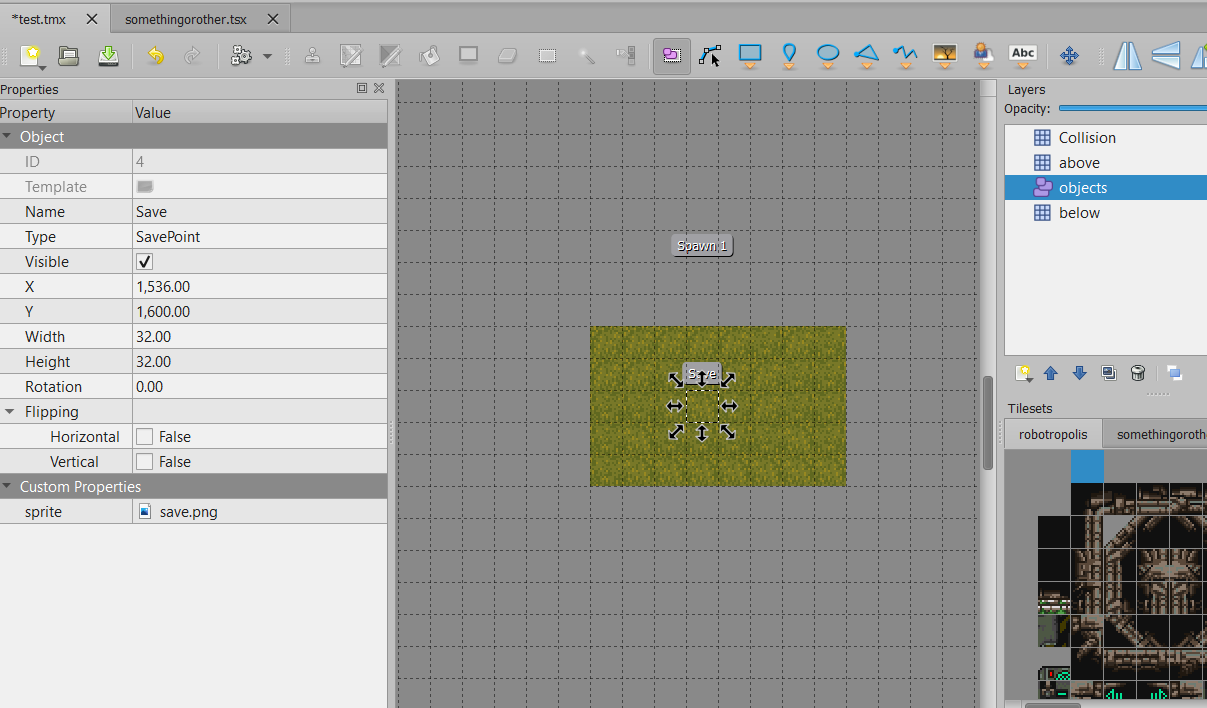
Similar to the previous tutorial, where we placed the player, we are going to once again create an object using a transparent tile. We will then set the properties for that object to be what I've shown above. Note the "Type" field is now "SavePoint".
Add a custom property named "sprite" of type "file".
Add a custom property named "sprite" of type "file".

Once you've done that, click the "..." button on that field and navigate to "art/sprites" and select "save.png".

Now save your map, export it as a lua file like you did in the previous tutorial, and test it out!
Adding a Chest
Now let's add a crucial component for any RPG-- a chest!
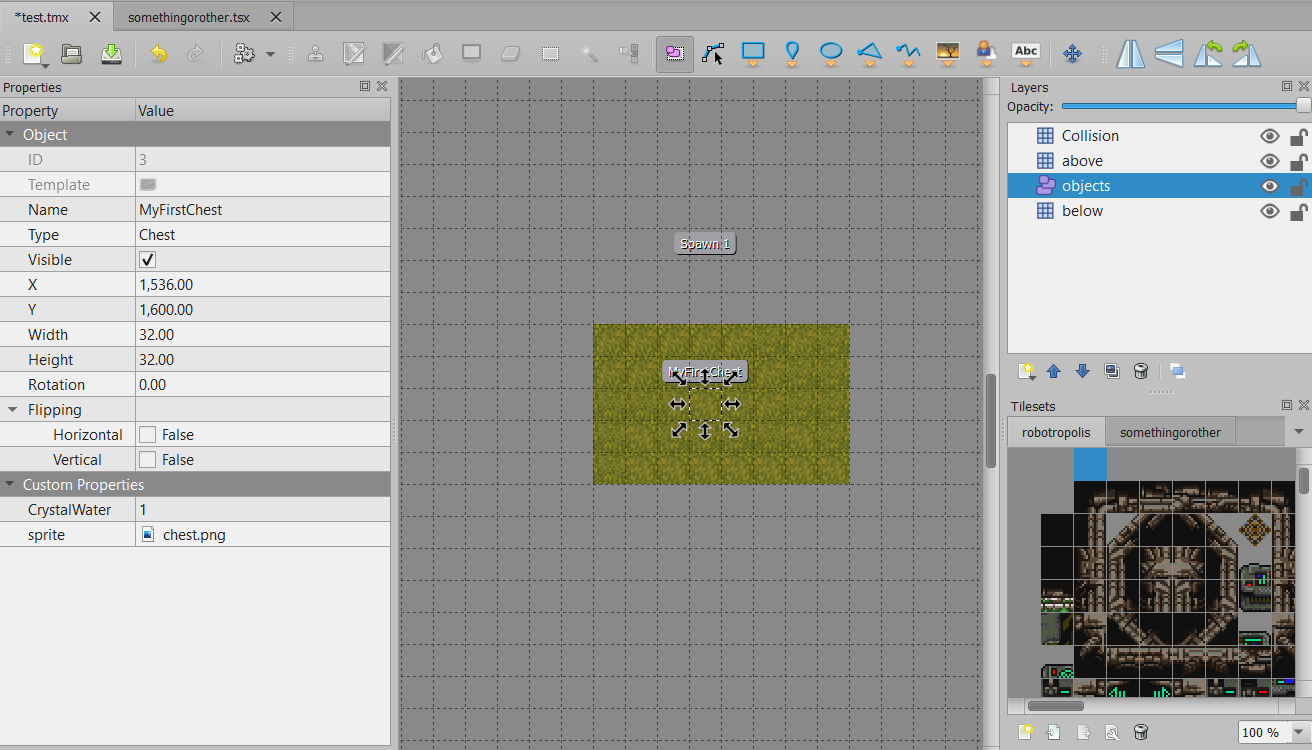
We are going to once again create an object using a transparent tile. We will then set the properties for that object to be what I've shown above. Note the "Type" field is now "Chest".
Under properties we will specify both what the chest contains, as well as the sprite for said chest. The Chest object as requirements on a given sprite having certain animations: "idle" and "open". For now, let's not get too fancy and just choose the standard chest sprite which can be found under "art/sprites/chest.png".
Under properties we will specify both what the chest contains, as well as the sprite for said chest. The Chest object as requirements on a given sprite having certain animations: "idle" and "open". For now, let's not get too fancy and just choose the standard chest sprite which can be found under "art/sprites/chest.png".

The property "CrystalWater" with a value of 1, suggests that this chest will give us exactly 1 "Crystal Water" item when opened.
You can play with this a bit, if you want. Any custom properties to the chest object you add, other than "sprite", will be considered to be the name and amount of an item you wish to grant. The item name you enter here must exist as a data file under either "data/items", "data/weapons", "data/armor", or "data/accessories".

Once you've finished placing and configuring your chest, test it out!
Adding a Hiding Spot
If you've played the 2020 demo, you'll be familiar with what this is. Hiding spots are things like pillars or piles of garbage that the player can press up against and peak around.
Same process as before, but this time, we will be widening the the object beyond 1 tile width. This will make the collision space longer, better representing the pile of garbage.

Set the properties for the object to the values shown above. It should have the following custom properties: a string field called "align" set to "bottom_left", a number field "hideOffset" set to 26, a bool field "hidingspot" which should be checked, and a file field "sprite" set to the png file located at "art/sprites/heap.png" in your source code directory.
Save and export your level as lua and test it out!

Adding an Enemy
Same steps as the previous objects: we will place a transparent object tile where you want an enemy to be. Make sure the object properties are what I have listed here:

(Note: The custom properties "battle" and "sprite" are of type file, while everything else is of type bool)
As before, the value of the "sprite" property should be set to a png file within "art/sprites"; in this case, "swatbot.png".
The value of the "battle" property should be a lua file within "data/monsters"; in this case, swatbot.lua. This file describes how your object appears and behaves in battle.

The value of the "battle" property should be a lua file within "data/monsters"; in this case, swatbot.lua. This file describes how your object appears and behaves in battle.
If you now save and test, you should see a Swatbot standing around, staring blankly into the void. If you placed the swatbot close to your player spawn point, however, he will likely immediately see you and chase you.

If, rather than a Swatbot, you'd like to place a Cambot, all you have to do is change a few fields. Change the "Type" to "Cambot" and change the properties "battle" and "sprite" to the cambot battle file and sprite, respectively.
If you want to place a Ratbot, you'll follow the same process, but you may want to consider widening the object to 3 tile widths rather than 1.
If you want to place a Ratbot, you'll follow the same process, but you may want to consider widening the object to 3 tile widths rather than 1.


Comments
Post a Comment